Last updated June 28, 2026
Garage Door Repair Maintenance Checklist for Miami Homeowners
Most garage door maintenance guides were written for climates where the air is dry and temperatures swing predictably with the seasons. Miami is neither of those things. The same 10-step checklist that keeps a garage door running smoothly in Denver will leave a Miami homeowner with corroded springs, swollen weather seals, and an opener that trips its own safety sensors by August. Over five years of service calls across Miami, Hialeah, Coral Gables, Kendall, and Doral, we’ve watched the same preventable failures happen to the same types of doors — because no one told homeowners what Miami’s climate actually does to garage door hardware.
Quick Answer
A Miami garage door maintenance checklist should include a monthly visual inspection of springs and cables for rust, a quarterly lubrication of moving parts using a dry or silicone-based lubricant (never WD-40 or grease), a seasonal check of bottom seals for UV cracking, and an annual opener sensitivity calibration to account for Florida’s heat-related sensor drift. Miami’s combination of 80%+ average humidity, intense UV exposure, and salt-air proximity accelerates hardware wear roughly twice as fast as inland climates — which means the once-a-year maintenance schedule most homeowners follow simply isn’t enough here.
Table of Contents
- Why Most Homeowners Use the Wrong Lubricant in Miami
- Torsion Spring Rust Check — The 30-Day Warning Sign
- Bottom Seal and Weatherstripping Inspection for UV Damage
- Opener Sensitivity Drift in Florida Heat — and How to Recalibrate
- Cable and Drum Inspection
- Miami’s Quarterly vs. Annual Maintenance Schedule
- Common Mistakes to Avoid
- When to Call a Professional
- Frequently Asked Questions
Why Most Homeowners Use the Wrong Lubricant in Miami
The number one item on almost every generic maintenance checklist is “lubricate the chain or drive.” The advice isn’t wrong — it’s the product choice that causes the problem. In Miami’s climate, where average humidity rarely dips below 75% and routinely exceeds 90% during summer months, the wrong lubricant becomes a magnet for airborne particulates. Within weeks, you don’t have a lubricated track — you have a grit paste that grinds against rollers and accelerates exactly the kind of wear you were trying to prevent.
What to use:
- Silicone-based spray lubricant — displaces moisture, doesn’t attract dust, and holds up well in high heat. This is the right call for tracks, rollers, and hinges in Miami.
- White lithium grease — appropriate for metal-on-metal contact points like the torsion spring coils and the opener’s drive gear. It’s thick enough to stay put in heat without running.
- Dry PTFE (Teflon) lubricant — excellent for nylon rollers, which are common on Clopay and Amarr doors. It dries on the surface, leaving a slick film that doesn’t collect dust.
What to avoid:
- WD-40 — a water displacer and degreaser, not a lubricant. It will strip existing lubrication and leave metal components dry within days. We pull out doors in Kendall and West Miami all the time where squeaky rollers were “fixed” with WD-40 three months prior — the squeaking comes back worse.
- Standard petroleum-based grease — turns into a dark, sticky paste in Florida heat that bonds with airborne dirt and salt particles. Heavy-duty chain grease from a hardware store is the wrong tool for this application.
Apply lubricant every 90 days — not once a year. Miami’s air quality and humidity mean quarterly lubrication isn’t over-maintenance, it’s the right interval for this market.
Torsion Spring Rust Check — The 30-Day Warning Sign
Torsion spring failure is the single most common reason homeowners in Miami call for emergency service. A spring that snaps leaves the door inoperable — and depending on what’s inside the garage at the time, it can cause real damage. The frustrating part is that most spring failures are visible 3–6 weeks before they happen, if you know the visual cue to look for.
How to perform a torsion spring rust inspection:
- Stand inside your garage with the door closed and look up at the horizontal metal bar above the door opening — the torsion spring is the coil wrapped around that bar.
- Look for surface rust. Light, even discoloration across the coil is normal surface oxidation — it doesn’t indicate imminent failure.
- Look specifically for rust that has formed in the gaps between coils. When rust appears in the inter-coil spaces, it means the corrosion has penetrated deep enough to weaken the metal’s tensile structure. This is the 30-day warning sign.
- Run a dry cloth lightly along the coil surface. If rust flakes off in quantity, the spring is past routine maintenance — it’s approaching end-of-life.
- Check for any visible gap in the coil. A small separation anywhere along the spring means it has already partially fractured. Do not operate the door manually. Call for service immediately.
In neighborhoods like Little Havana, Coconut Grove, and anywhere within two miles of Biscayne Bay, salt air dramatically accelerates spring oxidation. We see spring failures in coastal Miami zip codes at roughly twice the rate of inland areas like Doral or Hialeah’s western blocks. If your garage is less than a mile from the water, treat spring inspection as a monthly task, not quarterly.
Springs are under extreme tension and must only be replaced by a trained technician. Inspection is a homeowner task. Replacement is not.
Bottom Seal and Weatherstripping Inspection for UV Damage
Miami’s UV index averages above 10 from April through October — that’s the “very high” to “extreme” range, the same rating as parts of the Sahara. Rubber and vinyl seals that would last eight to ten years in a northern climate routinely fail in three to five years here, and they fail in a specific pattern that homeowners often miss until the seal is fully compromised.
UV degradation doesn’t cause seals to tear — it causes them to harden and crack. The bottom seal on your garage door should be flexible when you pinch it between your fingers. If it resists flexing, feels brittle, or shows hairline cracks running perpendicular to the door edge, it’s UV-degraded and no longer creating an effective seal. Water gets under the door, insects get in, and conditioned air gets out.
What to inspect and how often:
- Bottom seal (quarterly): Close the door and look from inside for any daylight gaps along the base. Even a quarter-inch gap in Miami lets in enough moisture to cause mold issues in a finished garage. Press the seal gently — brittleness means replacement.
- Side weatherstripping (semi-annually): Run your hand along both vertical sides of the door frame. The foam or vinyl strip should compress and spring back. Flat, cracked, or missing sections need replacement. Look specifically at the top corners, where UV exposure is most direct.
- Top seal (annually): The horizontal rubber strip at the top of the door often goes unnoticed until the first hard rain drives water in. Check for cracking and compression loss once a year.
Replacement seals for Clopay, Amarr, and Wayne Dalton doors are not all the same width — using the wrong profile leaves gaps even on a fresh install. Jacob Nguyen carries the correct seal profiles for the brands we service and can replace a bottom seal in under an hour on most residential doors.
Opener Sensitivity Drift in Florida Heat — and How to Recalibrate
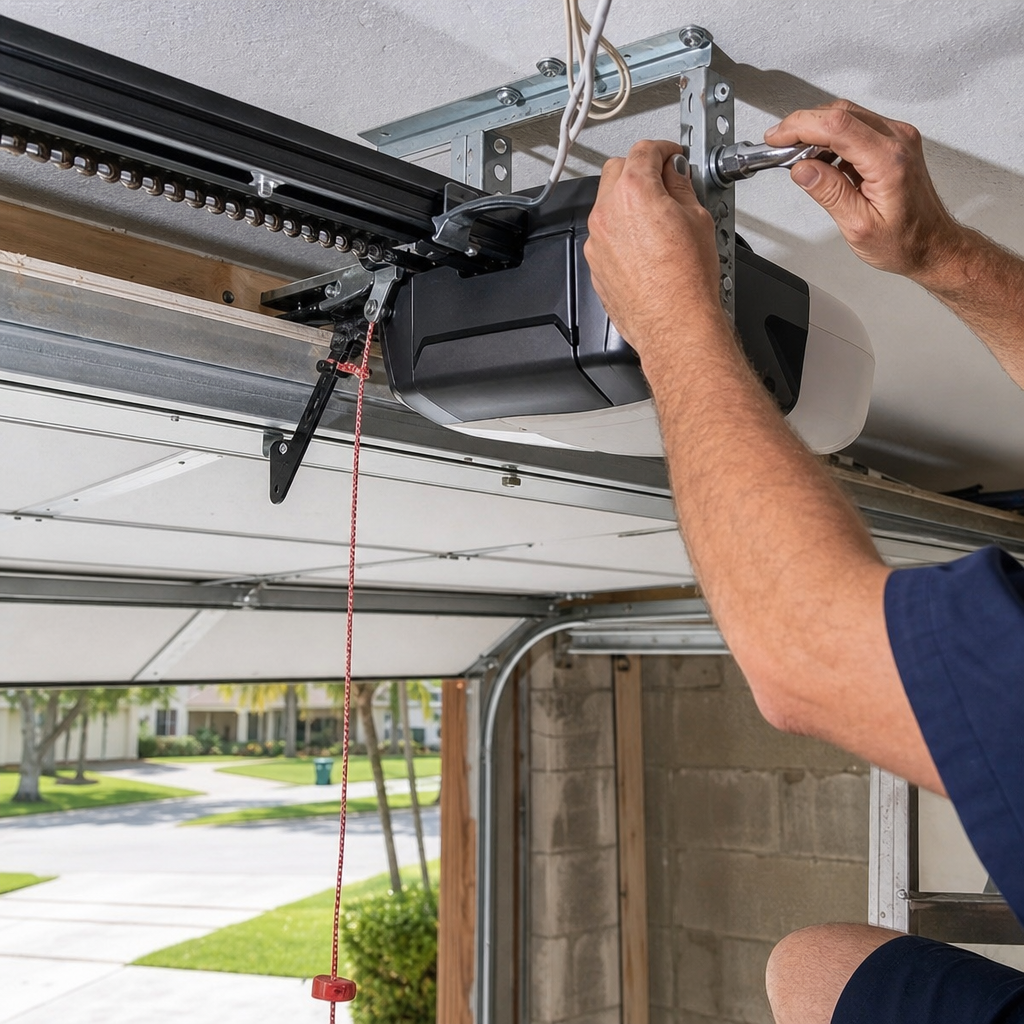
Your garage door opener has two safety settings that most homeowners never touch after installation: travel limits (how far the door travels up and down) and force sensitivity (how much resistance triggers the auto-reverse). Both settings drift in extreme heat — and Miami’s garage interiors regularly hit 110–120°F in July and August, which is outside the operating range most opener manufacturers design for in their default calibration.
When force sensitivity drifts too high, the door stops reversing when it should — a child or pet caught underneath won’t trigger the auto-reverse. When it drifts too low, the door reverses for no apparent reason or won’t close completely. Both are safety hazards, and both are solvable with a 10-minute calibration check.
How to test and recalibrate opener force sensitivity (LiftMaster, Chamberlain, Genie, and Craftsman models):
- Close the door fully. Place a 2×4 piece of lumber flat on the ground in the center of the door’s path.
- Press the close button. The door should contact the board, stop, and reverse within two seconds. If it doesn’t reverse, your down-force is set too high.
- Locate the force adjustment dials on the back or side panel of the opener unit (the motor head mounted to the ceiling). They’re typically labeled “Up Force” and “Down Force” or marked with arrows.
- Turn the down-force dial one notch counterclockwise and repeat the test. Repeat until the door reverses cleanly on contact.
- For travel limit drift — where the door doesn’t fully close or open — locate the “Down Limit” and “Up Limit” adjustment screws on the same panel. Turn in small increments (one full rotation = approximately 2 inches of travel on most models).
- After any adjustment, test the door five consecutive times before considering it complete. Heat makes settings drift gradually, not all at once.
Raynor and Wayne Dalton openers use a digital setup menu rather than physical dials — consult the model-specific manual before adjusting. If you’re uncertain which model you have or the adjustments aren’t holding, that’s a sign of internal component wear, not a calibration issue. Call for a diagnostic.
Cable and Drum Inspection
Lift cables carry the full weight of the door every time it operates. In Miami, the combination of humidity and the salt-laden air that moves inland from Biscayne Bay causes cable fraying to happen faster than homeowners expect — and a frayed cable doesn’t give much warning before it snaps. Cable failure typically results in a door that drops suddenly on one side, which is both dangerous and expensive if it lands on a vehicle.
What to look for:
- Individual wire fraying: Cables are braided from multiple fine wires. If you see individual wires sticking out or broken strands when you look closely, the cable is past its service life.
- Kinking or coiling abnormally on the drum: Cable should wind evenly around the drum without overlapping or bunching. Uneven winding puts asymmetric stress on the door and the track system.
- Rust or dark discoloration: Surface rust on cables accelerates fraying from the inside out. A cable can look intact while internal wires are already breaking.
- Cable slack when the door is closed: There should be minimal slack visible. Excess slack usually means the spring system is failing and no longer carrying its share of the load — the cables are overcompensating.
Like springs, cables are under significant tension. Visual inspection is a homeowner task. Any cable replacement or adjustment on a door with a torsion spring system requires a trained technician with the correct tools. This is not a DIY repair — attempting it without proper winding bars and spring-handling experience has sent homeowners to emergency rooms.
Miami’s Quarterly vs. Annual Maintenance Schedule
Miami doesn’t have four traditional seasons, but it does have two distinct operational periods for garage doors: dry season (November–April) and wet/hurricane season (May–October). Your maintenance schedule should reflect both, because the stress your door faces in August hurricane prep is completely different from what it faces in February.
Every 30 Days (Visual Check — 5 Minutes)
- Look at torsion spring coils for inter-coil rust (especially in coastal Miami zip codes)
- Listen for new grinding, squeaking, or hesitation during operation
- Check that the door opens and closes without the opener straining or jerking
- Verify the auto-reverse triggers by placing a board under the door (see opener section)
Every 90 Days (Active Maintenance — 20–30 Minutes)
- Apply silicone lubricant to rollers, hinges, and tracks
- Apply white lithium grease to torsion spring coils
- Wipe down tracks with a dry cloth to remove salt residue buildup
- Inspect bottom seal flexibility and UV hardening
- Test and adjust opener force sensitivity
- Check all visible bolts on the door’s bracket system — Miami’s humidity causes slight metal expansion and contraction that loosens fasteners faster than in dry climates
Pre-Hurricane Season (May — Annual)
- Verify your door has a valid Miami-Dade wind load rating or brace kit if required
- Inspect horizontal track mounting brackets for rust or loosening
- Test manual release operation — if power goes out during a storm, you need to know your door opens by hand
- Check that all spring and cable hardware shows no acute wear before storm season begins
Post-Hurricane Season (November — Annual)
- Full hardware inspection for corrosion accelerated by months of high humidity
- Replace any weatherstripping that didn’t survive summer UV and wind
- Professional tune-up before the dry season’s heavier social calendar increases daily door cycles
Homeowners in Miami who follow a quarterly schedule rather than an annual one typically see significantly fewer emergency service calls. Based on five years of calls across this area, most urgent failures we respond to were preventable with a 90-day check that was skipped or delayed.
Common Mistakes to Avoid
- Using WD-40 as a lubricant on any part of the door system. WD-40 is a degreaser, and in Miami’s salt air it leaves metal components bone-dry within days. We see this mistake on at least a third of first-time service calls — it creates the exact problem homeowners were trying to prevent.
- Ignoring the auto-reverse test. A garage door that doesn’t reverse is a safety hazard under Florida law. The force sensitivity drifts in summer heat — homeowners who don’t test it quarterly may not realize their safety system stopped working months before an incident.
- Treating a salt-air environment like an inland climate. Homeowners who move to Miami from other states often bring their old maintenance schedule with them. Annual spring inspections are adequate in Cleveland. In Miami’s Coconut Grove or South Beach zip codes, they’re not — spring corrosion moves faster than a 12-month inspection cycle can catch.
- Skipping the manual release test before hurricane season. A door that won’t open manually is a trapped exit during a power outage. Test the red release cord every spring, before you need it. Many homeowners discover the cord has corroded or seized only after a storm has already knocked out power.
- Replacing only one spring when two are installed. Most residential doors in Miami use a two-spring system (dual torsion). When one spring breaks, the second is typically at the same wear stage. Replacing only the broken spring and leaving the aged one in place leads to a second failure within months — sometimes weeks.
- Painting over weatherstripping to “refresh” the door’s appearance. We’ve seen this in older Coral Gables homes where the aesthetic was a priority. Paint seals the rubber, accelerating cracking and completely destroying the seal’s flexibility. If the stripping looks worn, replace it — don’t paint it.
- Assuming a slow door is just “getting old.” A door that takes longer to open or close than it used to is telling you something specific — usually friction from inadequate lubrication, roller wear, or a spring that’s losing tension. Ignoring it until the door stops working entirely always costs more to fix than addressing the symptom early.
When to Call a Professional
Some garage door tasks belong on the homeowner’s quarterly checklist. Others require a trained technician with the right tools — and knowing which is which keeps you safe and keeps your repair costs from escalating.
Call a professional immediately if you see any of these:
- A visible gap or separation anywhere in the torsion spring coil
- Individual wires fraying or broken on lift cables
- The door drops or jerks suddenly on one side during operation
- The opener motor runs but the door doesn’t move — or moves only partially
- Loud banging from the spring area during operation (pre-failure sound)
- The door won’t stay open and slides back down on its own
- Any opener adjustment that doesn’t hold — settings that keep drifting back indicate internal component wear, not a calibration issue
The Professional Garage Door Repair Miami Team offers free estimates throughout Miami — and because Jacob Nguyen is both the owner and the lead technician, you get a direct answer from the person who’ll actually do the work, not a dispatcher giving you a ballpark figure. Call (904) 552-6124 to schedule a same-day diagnostic or to ask whether what you’re seeing warrants a service call.
Frequently Asked Questions
How often should I lubricate my garage door in Miami?
Every 90 days is the correct interval for Miami — not once a year. Miami’s humidity, salt air, and heat accelerate lubricant breakdown and deposit accumulation far faster than the annual schedule recommended by most generic guides. Use silicone spray on rollers, hinges, and tracks. Use white lithium grease on spring coils. Never use WD-40 on any part of the system. Call (904) 552-6124 if you’re unsure which lubricant is right for your specific door and opener model.
What’s the best lubricant for a garage door in Florida’s humidity?
Silicone-based spray lubricant is the best all-purpose choice for Miami’s climate — it displaces moisture, doesn’t attract airborne particles, and holds up in heat. White lithium grease is appropriate for spring coils and metal-to-metal contact points. Petroleum-based greases and spray oils like WD-40 both perform poorly in high humidity and create grime buildup that accelerates wear.
How do I know if my garage door spring is about to break?
The clearest warning sign is rust forming specifically in the gaps between coils — not just surface discoloration, but rust that has penetrated the inter-coil spaces. When you see that pattern, the spring has 30 days or less before it’s likely to snap under normal load. A visible separation or gap anywhere in the coil means the spring has already partially fractured — stop using the door immediately and call for service. In coastal Miami areas near Biscayne Bay or South Beach, check springs monthly because salt air accelerates this process significantly.
Why does my garage door opener keep reversing on its own in summer?
This is a force sensitivity drift issue caused by heat. Miami garage interiors regularly exceed 110°F in July and August, which affects the calibration of the opener’s resistance sensors. When the down-force setting drifts too sensitive, the door reverses when it contacts even slight resistance — like heat-expanded door sections contacting the floor seal. The fix is a simple recalibration of the force adjustment dials on your opener unit (see the opener section above). If recalibration doesn’t hold, the internal control board may be degrading from repeated heat cycling — that warrants a service call.
Does Miami require a special garage door for hurricane season?
Yes. Miami-Dade County has some of the strictest wind load requirements for garage doors in the United States. Doors installed in Miami must meet the Miami-Dade Notice of Acceptance (NOA) requirements for wind resistance. If your home was built before 2002 or if a previous owner replaced the door without a permit, there’s a real chance your current door doesn’t meet current code. Homes in high-velocity hurricane zones (HVHZ) — which covers most of Miami-Dade County — require doors specifically rated for that designation. If you’re unsure about your door’s wind rating, Jacob Nguyen can assess it on a service call.
How much does a garage door tune-up cost in Miami?
A professional tune-up in Miami typically runs between $85 and $150, depending on what’s included — lubrication, hardware tightening, opener adjustment, and a full safety inspection. That cost is almost always lower than a single emergency repair call, which typically starts at $150–$200 before parts. In our experience serving Miami homeowners over the past five years, the homeowners who invest in annual or semi-annual tune-ups spend less on repairs overall and have far fewer emergency calls. Call (904) 552-6124 for a free estimate on what a tune-up would include for your specific door and opener setup.
The Bottom Line
Miami’s climate makes garage door maintenance genuinely different from anywhere else in the country. The humidity accelerates rust. The UV degrades seals in three years instead of eight. The summer heat drifts your opener’s safety calibration. The salt air works on coastal hardware in ways that inland checklists simply don’t account for. The homeowners in this city who keep their doors running reliably for 15–20 years without major repair bills aren’t doing more work than everyone else — they’re doing the right work on the right schedule. Quarterly lubrication with the correct products, monthly spring checks in coastal zip codes, and a pre-hurricane hardware review every May will keep most Miami garage doors out of emergency territory.
When something does need professional attention — a spring showing inter-coil rust, a cable with visible fraying, or an opener that won’t hold calibration — that’s when having a technician who actually knows Miami’s conditions makes a meaningful difference. Jacob Nguyen has handled these exact failure patterns across Hialeah, Coral Gables, Doral, Kendall, and greater Miami for five years, with 543 verified reviews averaging 4.9 stars as the record of that work. One call connects you directly to the person doing the job.
We also serve surrounding communities — if you’re in Hialeah, you can learn more about our Garage Door Repair in Hialeah, our Garage Door Installation in Hialeah, or our Garage Door Opener in Hialeah services.
Call (904) 552-6124 for a free estimate. Jacob handles it personally.
Written by Jacob Nguyen, Owner & Lead Technician at Professional Garage Door Repair Miami Team, serving Miami since 2021.